Have you noticed the night light feature in Windows 11? Windows 10 had a night light. It was designed to minimize eye strain by introducing warmer colors to the screen.
The Night Light feature was most effective in dark or dim environments. But it had issues. The light did not always work as expected. Those issues have followed the night light to windows 11.
5 Solution to Fix Night Light Not Working Windows 10/11?
For all its benefits, the night light is unstable. For some people, the night light stops working the moment the computer enters sleep mode. Once you exit sleep mode, the night light will disappear. For others, the night light doesn’t work at all. These are just a few of the solutions people have identified for the night light not working Windows 11 problem:
1. Enable Night Light
Is the night light enabled? Before you accuse the night light of failing you, make sure the night light is actually enabled. You can enable the feature by pressing the start button and going to ‘Settings.’

Click ‘Display’ and look for the night light. It has a switch that you can toggle on and off. If the switch is in the off position, you now know why it wasn’t working. The night light was disabled. Enable the feature by moving the switch to the on position.
You don’t have to jump through all these hoops. A more straightforward approach involves pressing ‘Windows + A’ to open a Quick Action menu that allows you to activate or deactivate the night light.
2. Set A Schedule
Go back to the display settings and select ‘Night Light.’ Clicking the tile will take you to the advanced settings. Move the ‘Schedule Night Light’ switch to ‘On.’ This action will provide access to a menu that lets you schedule the activation and deactivation of the night light.

Set the hours and minutes, and apply the changes. This fix is important because some people do not realize that the night light was scheduled to switch on and off at the wrong time.
3. Set the Date and Time
If you already went through the trouble of setting a schedule for the night light, but the feature has refused to work, check the date and time. For all you know, the night light is going on and off according to the schedule you specified, but your date and time are wrong, which means that the night light is going on and off at the wrong time.
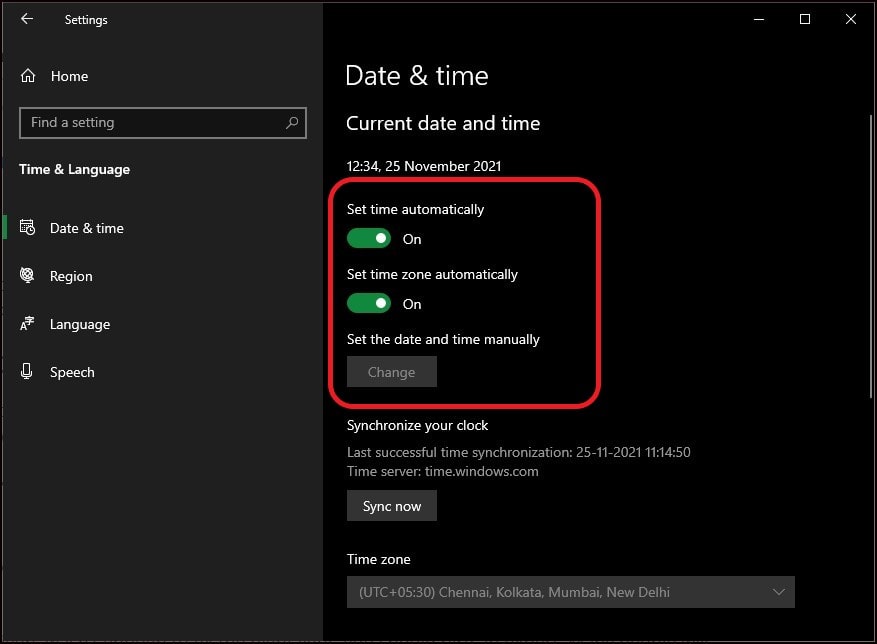
You can determine whether or not the date and time are correct by looking at the date and time at the lower right corner of your screen. To change the date and time settings, go to ‘Settings’ and select ‘Time and Language.’
Select ‘Date and Time’ again in the next window. Move the switches for ‘Set Time Automatically’ and ‘Set Time Zone Automatically’ to the ‘ON’ position. The last step is to click ‘Sync Now’ at the bottom. You can also set the date and time manually if you want.
4. Activate Location
Don’t allow the computer to automatically set the date, time, and time zone if the location services are not on. Otherwise, your computer may select the wrong date and time.
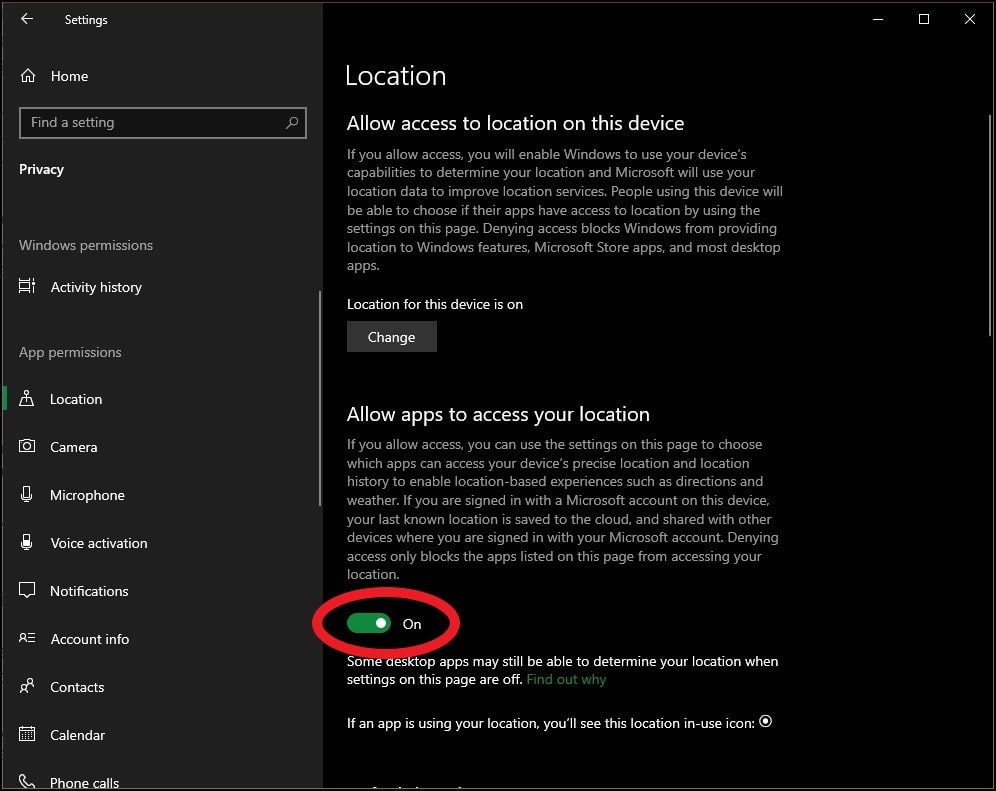
You can turn the location services on by going to ‘Settings,’ ‘Privacy and Security,’ and ‘Location.’ Move the switch to the ‘ON’ position.
5. Check The Drivers
The drivers are probably the problem if manipulating the settings was not enough to fix a malfunctioning night light in Windows 11. One option is to reinstall them.

Press ‘Windows + R’. When the RUN dialog box opens, type ‘devmgmt.msc. This will open the device manager. You can access this window from the settings as well.
Find the display drivers in the ‘Display Adapters,’ right-click and ‘Uninstall Device.’ Restart the computer. The operating system will reinstall the display drivers.

If reinstalling the drivers wasn’t enough to fix the night light, you should hire an expert. Many people will encourage you to access the Registry Editor to reset the night light manually. But the registry has sensitive information. A mistake will crash your computer. Don’t access the Registry Editor unless you know what you’re doing.
Other effective method watch video tutorial
Related Articles